Many of us probably struggle with being in the rough a bit. If you've ever noticed, those types of shots are much different than fairway or even sand shots. The rough grabs the club, slowing your swing down and actually turning your club in the process. So a well hit ball often goes the wrong way! Here's a great video that gives three easy tips to get out of the rough successfully.
Source: GolfChannel.com
Monday, October 5, 2015
Friday, July 10, 2015
How Long Would it Take You?
So golf is now getting to the point where drives range anywhere from 350 - 400 yards. If I could hit like that, my local course would be a piece of cake! With all of the advanced technology in the drivers and new swing methods, it's not too difficult for these pros to be hitting it like that. As a result, courses are now extending the length of some of their holes to increase the difficulty.
 At the Slovakia Challenge at Penati Golf Resort, they've got a Par 6 hole, which is the first ever on the European Tour. There are many people who are quite optimistic about this whole though. Ricardo Gouveia had this to say about it:
My personal opinion is that the courses should just make it more difficult by adding some doglegs or other features that make it a game of skill rather than sheer driving power.
Let me know your stance on these incredibly long Par 6 holes by leaving a comment down below.
Source: EuropeanTour.com
 At the Slovakia Challenge at Penati Golf Resort, they've got a Par 6 hole, which is the first ever on the European Tour. There are many people who are quite optimistic about this whole though. Ricardo Gouveia had this to say about it:
"It is a birdie opportunity, definitely. If you don't mess it up there's going to be a lot of low scores there this week." - EuropeanTour.comObviously with the distance these pros can hit the ball, it shouldn't be too hard to get it there in 3 and then 2 putt. That's what most seem to think anyway.
My personal opinion is that the courses should just make it more difficult by adding some doglegs or other features that make it a game of skill rather than sheer driving power.
Let me know your stance on these incredibly long Par 6 holes by leaving a comment down below.
Source: EuropeanTour.com
Thursday, July 9, 2015
How to Fix Your Slice and Hit Straight
So most golfers worst enemy is the slice with a driver off of the tee. You know, those of us who are scared that we're going to smash through the window of someone's house on the right side of the fairway.
Most of us know how to line up the drive, making sure that the line from the tips of your shoes is pointing right down the middle of the fairway. The part that often throws people off though is how to turn with the club and make solid contact with the ball.
Even if you don't tend to slice the ball bad, most golfers will at least have a minor slice that still goes off of their original line to the right. That can often lead to being in a sand trap or in the deep stuff (hopefully not behind a tree or rock). The good news is that with a little correction and practice, you can fix your slice and start to find the fairway everytime!
Rickie Fowler and Butch Harmon give some great tips to help straighten the swing out in this video. Source: GolfDigest.com
Good luck out there and keep 'em straight!
Monday, July 6, 2015
Have you Ever Made a Birdie Putt with Your Sand Wedge?
Golf is a hard enough game with using the correct clubs for your shot, nevermind using a wedge for a putter. That's exactly what Robert Streb did at Greenbrier. He damaged his putter after the front nine when he threw it to his caddie. As a result, he ended up making 3 birdie putts and 1 par putt with his sand wedge!
Check out this video to see to see him sink a 26 ft. putt with his sand wedge.
Source: PGAtour.com
If you want to see a compilation of his successful putting attempts at Greenbrier, check it out here.
Source: Golf.com by Coleman McDowell
Check out this video to see to see him sink a 26 ft. putt with his sand wedge.
Source: PGAtour.com
If you want to see a compilation of his successful putting attempts at Greenbrier, check it out here.
Source: Golf.com by Coleman McDowell
Wednesday, July 1, 2015
Putting Made Easy
If you're anything like me, you hit pretty well with the driver and irons...well, maybe just the irons, but you can't make a putt to save your life. Thankfully, there are people who are amazing at putting and have shared some valuable tips to help us not so good putters sink the putt.
Watch this video by Dave Stockton as he breaks down the correct steps to a putt, and teaches how to make putting like a pro a breeze! By the way, Dave is the guy who has worked with pro golfers like Phil Mickelson, Rory McIlroy, and Justin Rose...just to name a few.
Source: GolfDigest.com by Dave Stockton with Ron Kaspriske
Tuesday, June 30, 2015
Best 7 Layer Dip Around!
If you don't have a great 7 layer dip recipe, you've got to try this one! Even if you do have one, try this one. You won't regret it!
 The Ultimate 7-Layer Dip
Source: Mel's Kitchen Cafe
 The Ultimate 7-Layer Dip
Note:
STOP! Don't get scared away by all the components and ingredients
listed below. I promise it's not as complicated as it looks - and I
promise the result is worth it. This recipe is usually served in a clear
dish so you can see the layers. For a crowd, double the recipe and
serve in a 13 by 9-inch glass baking dish. Keep in mind that the parts
of the prep for the tomato and guacamole layers need to sit at room
temperature for 30 minutes before proceeding with the recipe.
Ingredients
Tomato Layer:- 4 large tomatoes, cored, seeded, and chopped fine
- 1 jalapeno, seeded and minced
- 3 tablespoons finely chopped cilantro
- 2 green onions, finely minced
- 2 tablespoons lime juice (from about 2 limes)
- 1/8 teaspoon salt
Guacamole Layer:- 2 green onions, sliced thin, green and white parts separated
- 1 jalapeno chile, seeded and finely minced
- 1 small garlic clove, minced
- 2 tablespoons lime juice (from about 2 limes)
- 3 avocados, pitted, peeled and chopped
- 3 tablespoons chopped fresh cilantro
- Salt to taste
Black Bean Layer:- 1 16-ounce can black beans, drained but not rinsed
- 2 garlic cloves, minced
- 2 teaspoons fresh lime juice (from about 1 lime)
- 3/4 teaspoon chili powder
- 1/4 teaspoon salt
Sour Cream Layer:- 1 1/2 cups sour cream
- 1 cup shredded pepper jack cheese
- 1 cup shredded sharp cheddar cheese
Cheese Layer:- 1 cup shredded pepper jack cheese
- 1 cup shredded sharp cheddar cheese
Extras:- Tortilla chips, for serving
Directions
- For the tomato layer, in a medium bowl, combine tomatoes, jalapeno, cilantro, minced green onions, and lime juice. Stir in salt and let stand until tomatoes begin to soften, about 30 minutes. Strain mixture through a fine mesh strainer or colander and discard the liquid. Set aside.
- For the guacamole, in a small bowl, combine the white parts of the green onions, jalapeno, garlic and lime juice. Let sit for 30 minutes. Add two-thirds of the avocado to the bowl with the jalapeno mixture and mash with a potato masher until smooth. Gently fold remaining avocado into mashed avocado mixture. Gently stir in the green parts of the green onions and the cilantro. Season with salt. Set aside.
- Pulse black beans, garlic, remaining lime juice, chili powder, and remaining salt in a food processor until mixture resembles a chunky paste. Transfer to a glass 8X8 or 9X9-inch dish or similar sized bowl, spreading into an even layer. Quickly rinse and wipe out the food processor and pulse the sour cream, 1 cup pepper jack cheese cheese and 1 cup sharp cheddar cheese until smooth. Dollop the sour cream mixture on top of the black bean layer, smoothing to the edges in an even layer.
- Sprinkle evenly with remaining cheese. Spread guacamole over cheese and top with tomato mixture. Sprinkle with additional sliced green onions, if desired, and serve with tortilla chips. The dip can be tightly covered and refrigerated for up to 24 hours.
Source: Mel's Kitchen Cafe
Friday, June 26, 2015
The Most Delicious Dessert Yet
So I love dessert. Who doesn't though...right? I've had desserts of all kinds; cakes, cupcakes, brownies, ice cream, lemon bars, pies, etc. That being said, I have never had a dessert that was as good as the Vanilla Bean Coconut Cake! This thing is absolutely amazing! I just can't get enough of it.
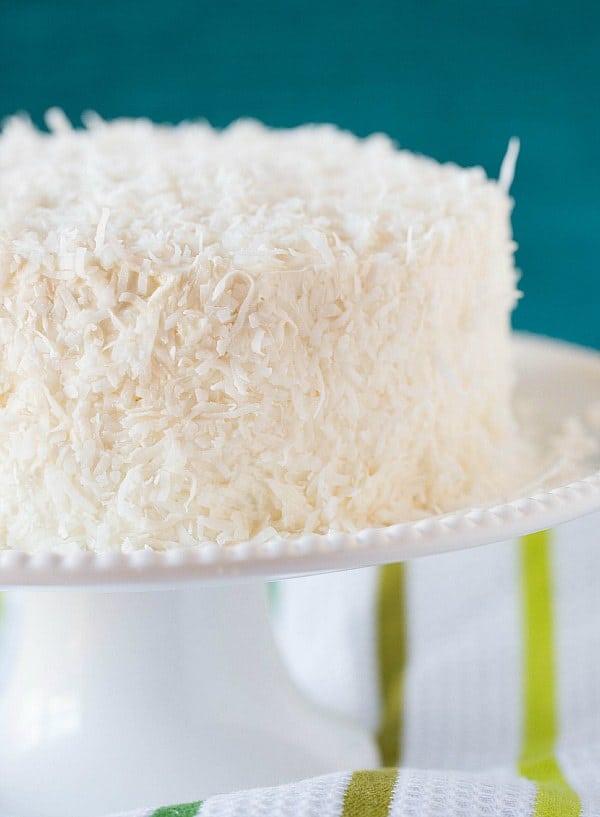 Now I'm not exactly sure why this is my favorite cake because I'm not really into coconut. The overall taste is just divine though! One of the best parts about it too is the meringue frosting. It is silky smooth and delicious!
One thing that we've done for those who don't like coconut that much is to only cover half of the cake with coconut instead of the whole thing. All I can say is that if you want the absolute best dessert ever made, you need to make this cake! Here's the recipe. Enjoy!
Coconut-Vanilla Bean Cake with Coconut Meringue Buttercream Frosting

Yield: 8 to 10 servings
Prep Time: 1 hour 30 minutes
Cook Time: 35 to 45 minutes
Total Time: 2 hours 30 minutes
A fabulous, moist coconut cake studded with vanilla beans is filled and coated with a coconut meringue buttercream frosting.
Ingredients:
For the Cake:
2¼ cups cake flour
1¼ cups granulated sugar
2 teaspoons baking powder
½ teaspoon kosher salt
¾ cup unsalted butter, at room temperature, cut into 2-inch pieces
6 egg whites
1 cup coconut milk
1 cup sweetened shredded coconut
1 vanilla bean, split in half lengthwise
For the Frosting:
1½ cups granulated sugar
6 egg whites
1½ cups unsalted butter, at room temperature, cut into 2-inch pieces
1 teaspoon vanilla extract
¼ teaspoon kosher salt
⅔ cup coconut milk
For the Garnish:
1 cup sweetened shredded coconut
Directions:
1. Make the Cake: Preheat oven to 350 degrees F. Grease and flour two 8-inch round cake pans; set aside.
2. Sift the cake flour into the bowl of an electric mixer. Add the sugar, baking powder and salt and beat on low speed for 15 seconds to combine. Add the butter pieces and beat on low speed for 1 minute, or until the mixture is coarse and crumbly.
3. In a separate medium bowl, whisk together the egg whites, coconut milk and the 1 cup shredded coconut until combined. Scrape the seeds from the vanilla bean into the mixture and whisk to thoroughly incorporate the seeds throughout the mixture.
4. Add half of the coconut milk mixture to the dry ingredients and beat on medium-high for 1 minute. Scrape down the sides and bottom of the bowl, add the remainder of the coconut milk mixture and beat on medium speed for 30 seconds, or until the batter is well-mixed, light and fluffy.
5. Divide the batter evenly between the cake pans and bake for 35 to 45 minutes, or until the tops are firm and golden brown and spring back when pressed lightly in the center. Let the cakes cool completely in the pans on a wire rack.
6. Make the Frosting: In a small, heatproof bowl, whisk together the sugar and egg whites. Place the bowl on top of a saucepan with about an inch of simmering water (do not let the bottom of the bowl touch the water). Heat the mixture, whisking occasionally, for 6 to 8 minutes, or until the mixture is hot to the touch and the sugar is dissolved.
7. Remove the bowl from the heat and transfer the mixture into the bowl of an electric mixer. Using the whisk attachment, whip on medium-high speed for 6 to 8 minutes, or until the mixture becomes a light, white meringue and the mixture is cool to the touch. Reduce the speed to low and add the butter a couple of pieces at a time. Increase the speed to medium and mix for 4 to 5 minutes, or until the butter is thoroughly incorporated and the frosting is smooth and glossy. The frosting may initially look curdled after adding the butter, but continue beating and it will come together, looking smooth and creamy by the end of the mixing time.
8. Add the vanilla extract, salt and coconut milk and whip for another few minutes on medium speed, or until the coconut milk is thoroughly incorporated and the frosting is smooth. Again, the buttercream may look thin and separated, but continue mixing until it comes together. It will be more of a satin-like consistency, versus the thick powdered sugar frostings that are often used.
Note: Use the frosting within 30 minutes, or transfer to an airtight container and store at room temperature for up to 1 day, then beat with a mixer (using the paddle attachment) until smooth before using. You can also store the frosting in an airtight container in the refrigerator for up to 2 weeks, then bring to room temperature and beat with a mixer (using the paddle attachment) for 6 to 8 minutes until smooth before using.
9. Assemble the Cake: Remove the cooled cakes from their pans and level the tops, if necessary. Place one cake layer on a cake stand and top with 2 cups of the frosting, using an offset spatula to spread it evenly to the edges.
10. Place the second layer on top, top-side down. Spoon 1 cup of the frosting onto the top of the cake and use a large offset spatula to spread the frosting on top and over the sides of the cake, covering it with a very thin layer (this is the crumb coat). Refrigerate for 20 minutes.
11. Use a wooden spoon to mix the remaining frosting to lighten it up since it has been sitting. Spoon it onto the cake and spread it evenly over the top and down the sides. Use an offset spatula to create a smooth finish. Press the 1 cup shredded coconut onto the top and sides of the frosted cake. The cake can be stored in an airtight container at room temperature for up to 3 days.Source: BrownEyedBaker.com

Subscribe to:
Posts (Atom)